(→Comparing Maps: added note about image comparators, no specific link included) |
m (→Elona: that is precisely why we have GW:ULC :)) |
||
| Line 167: | Line 167: | ||
**Go down to the docks on the north side of the town and out on to the boat. This will uncover the island in the bay for an extra 0.1%. |
**Go down to the docks on the north side of the town and out on to the boat. This will uncover the island in the bay for an extra 0.1%. |
||
*[[Marga Coast]]: |
*[[Marga Coast]]: |
||
| − | **An area that is not normally accessible can be accessed by flagging a hero or henchmen past the portal to [[Sunspear Sanctuary]] from [[Marga Coast]]. Once they are across the portal and off to the side where the terrain blocks the line of sight to them, a skill such as [[Ebon Escape]], [[Death's Retreat]], [[Return]], and [[Shadow Meld]] can be used to [[shadow step]] to the ally's location. An [[ |
+ | **An area that is not normally accessible can be accessed by flagging a hero or henchmen past the portal to [[Sunspear Sanctuary]] from [[Marga Coast]]. Once they are across the portal and off to the side where the terrain blocks the line of sight to them, a skill such as [[Ebon Escape]], [[Death's Retreat]], [[Return]], and [[Shadow Meld]] can be used to [[shadow step]] to the ally's location. An [[end of the world]] is present on the other side, but far enough back to allow about 0.1% to be explored. A video of this can be seen [http://www.youtube.com/watch?v=k6TWlAW5Hvc here]. |
*[[Pogahn Passage (mission)]]: |
*[[Pogahn Passage (mission)]]: |
||
**There is a seemingly closed door to the west of the Escape Point . You can run straight to the door after starting the mission and walk through it to explore more of Gandara's southwest area. The correct door has 2 Kournan Guards behind it. |
**There is a seemingly closed door to the west of the Escape Point . You can run straight to the door after starting the mission and walk through it to explore more of Gandara's southwest area. The correct door has 2 Kournan Guards behind it. |
||
Revision as of 01:29, 2 June 2009
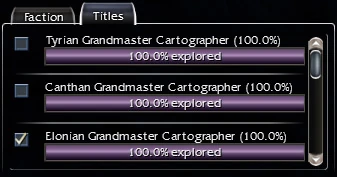
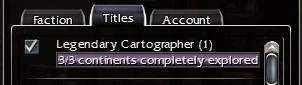
Overview
The Cartographer titles are gained per character by exploring the primary map of each continent. Any area viewable when viewing the world map counts towards the title. This includes the following:
- Explorable areas
- Mission zones (cooperative, challenge and competitive)
- Arenas not on the Battle Isles
- Towns and Outposts including exclusive areas for Canthan outposts
It does not include any area which is not shown on the world map of any continent. This includes the following:
- In Tyria:
- Pre-Searing Ascalon (this area has its own explorable map)
- The Dragon's Lair mission location
- The Dragon's Lair mission area
- Sorrow's Furnace
- In Cantha:
- In Elona:
- Core areas: Any area that appears on The Battle Isles or shows the Battle Isles map, this includes:
- The Battle Isles themselves
- The Fissure of Woe
- The Underworld
Note: The Undercity in Cantha now functions like the Fissure of Woe and The Underworld, all exploration in it is reset upon return trips, and it no longer impacts the percentage explored.
To gain the Grandmaster Cartographer title, a character does not need to explore every single point on the map. Some margin of error is allowed. As a result, even though some characters may never be able to access some portions of the map, they may still earn 100% explored. Unreachable zones would most likely be arenas that have been rendered inaccessible due to a game update (such as Fort Koga) or due to level limits (such as the Shing Jea Arena). Again, these zones do count towards the titles for those who revealed them, but they do not make it impossible for those who cannot to obtain the grandmaster title.
Portal Jumping Project
A project is currently underway to find additional areas that can be explored, or areas that can be explored mob-free through using shadow stepping through portals. For details, see the Portal Jumping Project article.
The Maps
Check out the Maps section in this wiki for general maps of Cantha, Tyria and Elona. If stumped, search online for maps posted by those who have reached grandmaster. Compare them with yours to find differences along the edges. Using an image editor (such as Photoshop for example) can greatly help in revealing missing areas when comparing maps. Some related forums may provide support to help look.
Comparing Maps
Comparing your in-game map to a complete map you downloaded side by side often will not suffice to spot tiny missing parts along the edges of areas. Use the following processes to make them visible (note that this may not work on computers with low performance):
- Download a map. They’re often quite big, best not to open in a browser.
- Open the image in a graphics editor or image viewer program of your choosing.
- Open up Guild Wars in windowed mode, keeping the image still open in the background.
- Open your minimap (default key is 'U'), and make it as large as you are comfortable with.
- Move to an area you want to check by click-dragging the map.
- Swap between Guild Wars and your image viewer, and adjust the position of your minimap and/or the image until they line up.
- Once you have the maps perfectly lined up, rapidly switch back and forth (i.e. by using alt-tab or by clicking on the Windows Task-Bar) and note where the differences are (they should be easily discerned using this technique).
- Note that there are more convenient ways to compare maps. These include using an image comparator. There are such aviable online, or as a free downloadable software or commercial software. For example the Adobe Photoshop difference layer mode reveals every single spot missing in your maps, or even in the sample map. This saves tons of time by choosing the most efficient areas to explore.
The Math
A fully explored area equal to the size of the radar around a player equals roughly 0.1% of Cantha. The percentage is less for Tyria (about 0.07%) as it is a larger continent.
Exploration Tips
- Scrape! Working towards the grandmaster cartographer title (when you have already achieved 90%) will most likely require you to revisit every explorable area on the continent. Small, trivial regions of a map can be revealed by 'scraping' (hugging the outside wall of) the area while periodically facing the wall, as well as (oddly enough) facing away from the missing part. Hence, finding a nook or cranny, and "spinning", to look a full 360, helps. The top of your compass will show a lighter area, representing your view. You should expect to spend hours scraping, usually with henchmen, as human players typically want to move towards a specific target.
- It adds up: While each of these regions may seem small and insignificant, they easily add up to entire percentages towards the title. Scraping the outside wall of an area you have not scraped before may produce 0.1 to 0.2% even though it may not actually reveal any fog on the map.
- Speed: Using a speed spell helps when traveling to unmapped areas, but increases the likelihood of server lag. Your position ends up patchy on the server side, even though your computer shows it to be fluid.
- Nooks and crannies: Some map edges are quite convoluted, and the typical automatic run facing 45 degrees will not be enough. Areas like the south-east corner of Ettin's Back require constant mouse movement to negotiate the nooks and crannies.
- "Magic Spots": There are some map areas which you can only obtain while standing in one specific place and looking in one specific direction, often a nook or cranny which a 45 degree slide gets stuck in. If there's an elusive segment, you can bet it's one of these. Look for these nooks and crannies, and then spin in place at least once to be sure it's not one. In a few very rare cases, time spent in a "Magic Spot" seems to be relevant. Don't be amazed to find that being in a place for 15 or 20 seconds gets you a Magic Spot area, despite not moving or changing viewpoint. Waiting is not usually worth actually doing a lot, but it can get you some odd areas sometimes.
- Missions: Mission explorable areas usually have a lot of space that players miss due to a few factors:
- Time: Some missions require players to race against the clock to complete an objective. This causes most parties to just rush through the mission area and not explore it.
- Unlocking: Events in missions may often open up areas previously inaccessible. Keep track of opening doors and dropping bridges.
- Stand-offs: Some missions require that the party holds out against a siege to protect an NPC. Such missions will usually have explorable areas outside the siege area that players will not be capable of exploring while the siege is taking place.
- There are times where there are fewer foes to kill in order to explore during missions, so think about exploring during missions example: Instead of exploring Lahtenda Bog opt to do Blacktide Den mission instead.
- Cutscenes: Because cutscenes are rendered in-game, everywhere the camera goes during a cutscene will count as having been explored. Many cutscenes move to areas that are otherwise inaccessible, so you should take the time to watch all cutscenes. Specific examples include:
- The final cutscene of Sanctum Cay (mission) will explore a small area off the eastern coast while you are in the boat.
- The final cutscene of Pogahn Passage (mission) will likewise explore a small area to the southeast of Gandara.
- Any of the various cutscenes that feature Varesh Ossa in her military headquarters will explore a spot on the southern edge of Forum Highlands.
- Do not neglect towns and outposts: Some areas of the map can only be revealed by scraping the edges of larger towns, outposts, and mission heads. Often, large portions of the map may be uncovered by exploring an empty but accessible part of a town. The Henge of Denravi, for instance, is quite huge.
- Zoning Points: When passing through an area boundary into a new zone, players may find themselves placed significantly further ahead than the visible boundary, or "portal." In these cases, it is necessary to backtrack toward the portal and scrape the area to reveal additional map. Several of these points exist across the campaigns, an example of which is when entering Arkjok Ward from Command Post.
- Vanquishing: When vanquishing an area, you are likely to go to most-every place in the explorable area. This is a good opportunity to explore and scrape the area, too, since there will be no monsters present.
Often missed
These are specific areas commonly missed by cartographers. It has recently been reported that it is easier to get the title than before. You do not need to explore all of the secret areas to get the 100% title.
Tyria
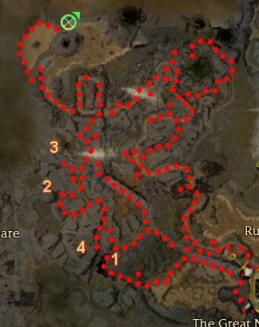
Great Northern Wall: Path with numbers indicating areas not to be missed
- The Great Northern Wall: After the timer starts in the final part of the mission, the entire Charr camp can be explored. The western road from which Charr come at you while approaching the bridge can also be used to reveal all the map between the mission area and Piken Square. It was once possible to use teleporting skills, such as Necrotic Traversal to explore the area without starting the timer. This is now very hard, as the skills can no longer be used to appear on top of bridges by exploiting a corpse below. There is a minor chance that a Moa bird can be found along the border between the regular mission area and the area found after the final cutscene. If so, the Moa could be killed with spells and Necrotic Traversal or Consume Corpse used to travel to the area. Skills such as Rebirth can be used by a Monk/Necro or Necro/Monk to bring a whole party over for exploration. Otherwise, you will need repeated attempts with as many speed-enhancing skills as possible. When exploring the area, there are three places where you can explore westward. All three must be explored in order to fully de-fog the map. In addition, players can explore northward. To do this, they must trigger the cutscene at the end, then run towards the approaching Charr. The Charr bunch up as they exit, allowing a player to go wide and run past them. Or you can run across the bridge and stand on the right and let the Charr pass, you then have 90 seconds to run back for exploring. Running speeds are important, though exploration can be done over several attempts as well. At least 0.3% can be cleared, as compared to a normal mission run with some exploration westward. The total if no westward exploration has been done would be much higher.
There is a "End of the world" bug you can access by walking on the black hole east of the Charr camp.
- Ruins of Surmia: There is a small path just before going through the gate to the left of the Historical Monument of Surmia that will allow you to explore the northeastern bank of the lake. You must also have Prince Rurik with you to open the gate that the Flaming Scepter Mages come out of to explore the northeastern corner of this mission.
- Nolani Academy: Be sure to explore the western edges of the mission, as these are usually not explored by just doing the mission. Scraping a hill with Gargoyles can result in a lot of extra defogging, resulting in 0.1-0.2% extra to your title.

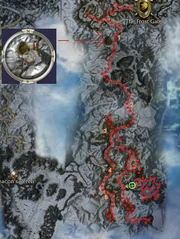
Frost Gate: Path with numbers indicating various options
- The Frost Gate: You can use either of the necromancer skills Necrotic Traversal or Consume Corpse to reach the road used by Rurik. There are several options, with the number corresponding to the location on the map: 1) getting one or more of Rurik's guards killed by Ice Golems or rampaging minions (Point 1 on the map to the right); 2) a Snow Wolf may appear near the exit of the ice cave by a cliff (Point 3 on the map). Regardless of the option chosen, the corpse is used to teleport onto the path. Additionally, the skill Rebirth can allow more party members to travel onto the path if there are not enough corpses. Option 1 can be achieved by pulling an Ice Golem beyond the bridge to attack the guards. Alternatively you can use a minion master hero with Bone Fiends and make him over-sacrifice on the edge just past the bridge. This will make the fiends hostile and kill 1 or more of the guards but possibly also Rurik. It is recommended to backtrack to explore the path northward first, then head southward. Watch out, as towards the end (point 5) there is a single enemy on Rurik's path. Resist the temptation to kill him and simply run by, as a growing series of spawns appears, (that usually kill off Rurik if you take too long at the end of the mission). Taking the earlier teleportation option has an advantage, since Rurik will stay put, fearing the catapult. Using later options may cause the mission to fail if Rurik dies. By using option 1 it is possible to return back to the normal mission path - with Rurik still at the first bridge the mission will not end if he dies (a cutscene will move him forward, but his death does not cause mission failure). Players can explore all the way to the end, killing all mobs and bosses and doing everything except placing the third gear. The best point to return to the main path is point 3, by targeting one of the Engineers (the south-western is best). (Note that point 4 looks appealing but will be a dead end at this time). At the end of the mission a door opens up allowing access to the south-eastern corner of the mission area. Roughly 0.4% of Tyria was uncovered this way, as compared to a fairly thorough mission run. Players can then place the final gear and even end the mission with full success despite Rurik's death. Note: After thorough wall-hugging of the rest of the mission map, this trick only uncovered about 0.1% of the total map.


The #1 indicates the area where one can slip behind the house where Oink is found and take a back way to uncover a bit more territory
- Griffon's Mouth: South of Aidan is a series of interconnecting tunnels, and includes an Ice Drake to fight.
- Gates of Kryta: A typical mission run leaves a fair amount of coastline unexplored. Scrape the edges along the coast. In addition, at the very beginning, near Oink, it is possible to slip behind the nearby house and reach an area where undead gather. After a battle that is possible through patient pulling or the right build, you can uncover a bit more area. The image shows the coastline scraping as well as the #1 indicating the rear passage to the undead mobs.
- Lion's Arch: The southern tip of the city can reveal some of the coastline (some players think it's part of the Gates of Kryta mission). A path to the right of the center dock (south of the city) allows access for exploring under it. Characters wishing to explore Lion's Gate need to talk to Lionguard Bedo for access.
- Kessex Peak: Scrape the southernmost and westernmost borders of this area carefully, as it is difficult to clear all of the clouds.


The Wilds: An image of a player standing in an area he is normally unable to access
- The Wilds: Start the mission with a Ranger who has the following nature rituals and skills: Lacerate, Toxicity, Predatory Season, Winnowing, Quickening Zephyr, Serpent's Quickness and Troll Unguent (optional). Bring along another player with Favorable Winds, and make sure you bring Consume Corpse or Necrotic Traversal. After seeing the last cutscene in the mission (at the point where you have to rescue the Chosen), all party members should step back. Then send the spirit ranger in. Position the spirits at a location where Evennia will be in range of them, but ensure that the Ranger won't be attacked by the spiders. (Either side of Evennia will work, since spiders will be obstructed). Once you reach Evennia, either you or the Ranger (depending on if you are using heroes or not) should make an attempt to lure all of the spiders to begin attacking her. It is perfectly fine if you are unable to get the first or even the second spawn of spiders to be able to hit her, but realize you MUST have the aggro correct before the third spawn. Have the Ranger repeatedly spam the spirits, and keep them all up as much as possible. This will tack on additional degen in the form of +2 degen from Toxicity, Bleeding when Lacerate dies, and +2 when Lacerate is up again. The Quickening Zephyr will also make Evennia's only heal (Heal Area) recharge faster and cost more energy. She will also have to use it a little more often. Predatory Season causes Evennia's Heal Area to heal for less, and heal the spiders when they hit with an attack. The Other spirits are to keep the spiders alive longer and do more damage. When all spiders are attacking Evennia, kill the group that is alive for all except one, and run out of range, so Evennia will kill the last one. The third and final spawn of spiders will have a Ranger boss. Keep all spirits up as much as possible except Lacerate, which you want to die, (and quickly replace once dead). You will need to witness Lacerate die 2-3 times before Evennia will run out of energy and cease healing herself. An excellent way to make Evennia run out of energy is to bring Blood Ritual, and spam it on your spirit ranger, Evennia will waste most of her energy healing you using Heal Other and will die from not healing herself. Exploit Evennia's corpse and go exploring! (It's a good idea to exploit the chosen corpses beforehand, if you are worried about missing your chance to exploit Evennia's).
- Bloodstone Fen: Run past Justiciar Hablion and his group to explore a small area past them for 0.1%. (Generally the Justiciar won't even follow you, and you can come back to finish the mission).
- Aurora Glade: Before entering the mission, explore the hidden area to the north/north-west behind a hut. This is an easy to miss area but reveals a fairly large section. Once in the mission, avoid tuning all three of the crystals while you fight off the White Mantle until you have completely explored the area east of the portal. There is a path (often used for the bonus) past the right most gate that can be used to sneak behind the White Mantle forces. Alternatively, there is usually a warthog just past the last gate. Kill it and use Necrotic Traversal or Consume Corpse to teleport behind the gate and explore freely without having to deal with the White Mantle.
- Henge of Denravi: The western and northern edges of the city can reveal some map. If you have not scraped this area before you have received the Defend Denravi quest, you may need to abandon the quest until you have mapped this area completely. After you have mapped this area, you can return to Droknar's Forge and reactivate the quest.
- Tangle Root: The area east of where Old Joness is can be explored.
- Riverside Province (mission): Many players miss the large swamp area (along the south-eastern side) and path leading to the river bed (on the north-eastern side) after you receive the staff! The riverside on both sides of the bridge where the end boss is, can be explored. If you have not picked up the Scepter of Orr, you can kill the boss at your leisure and cross the bridge (crossing the bridge with the scepter in hand triggers the end of the mission). Scraping all the mission area as described nets about 0.8%.
- Sanctum Cay: The groups that come after Vizier Khilbron at the end of the mission come from explorable but densely populated shorelines to the south and the north-east. If you go into these areas and do not kill all of the enemies there, large numbers will go stand on the dock with Vizier, it is possible to complete the mission, but players must watch the Vizier's health, as he can become overwhelmed easily. In order to explore the areas to the south and north-east you will have to stay as far from the dock as possible by scraping the ridge just west of the dock to delay furthering the mission until you are ready.
- The Amnoon Oasis: The coastline of the city can be explored.


explorable paths behind the bridges
- Dunes of Despair: One of the trickier missions to explore. You will likely need a friend to stay with the Ghostly Hero along with henchmen to keep him alive while you explore. Alternatively, a single properly configured bonder monk hero will be able to keep Ghostly Hero alive for the entire 10 minute period, giving the rest of the party a chance to explore the area. Remember to flag the hero in the entrance corridor to avoid aggro. You can also try avoiding the enemy ghost altogether and using Necrotic Traversal to jump across the northern bridge. There are three enemy bases to explore at the southern end of the map, the western one will have a draw bridge drawn up. You can still walk through it. In addition, there is a very large area to explore east of the eastern most base accessible through a tight tunnel slightly north of the south-eastern base. Beware of the large number of Jade Scarabs that crawl out of the ground. The area north of where the second Siege Wurm spawns can be explored. Roughly 0.7% was uncovered doing this.
- Augury Rock (Ascension mission): Providing you do not step on all three runes, you can explore parts of the area.
- Tomb of the Primeval Kings: Accessible once you have ascended. (Take the north exit from The Dragon's Lair (location)). Note that you are only required to explore the outpost; the tombs themselves do not count towards the title.

Talus Chute: An example of the crazy sights as well as the route taken
- Talus Chute: The north-eastern corner of the area can be explored by climbing hills along the eastern edge between the Icedome and Ice Caves of Sorrow. The spot you climb into this area from is in a nook of land you reach from the river. This uncovers about 0.1%.
- Thunderhead Keep: Delay talking to the king at the end of the mission to explore the area outside the keep. Also, there is a path to the east from the beginning that is infested with Avicara. Another method is to, after clearing the keep, take your entire party and leave the keep, scraping the entire area. Giants will spawn and surround the king, but they will not attack him until the party circles around and they reappear on the mini map. In this way, you can clear the area at your leisure.
- Hell's Precipice: The cinematics in the mission will cause the party to skip some areas of the map. Backtrack to reveal them.
Cantha
- Shing Jea Monastery: During the Dragon Festival, Shing Jea Boardwalk, Canthan New Year and Gamer Weekend events, Shing Jea Boardwalk was open for all characters. It occupies the same area as Monastery Overlook, the normally Canthan-exclusive starting area beyond the monastery gate, allowing characters born on other continents to explore this area.
- Monastery Overlook can also be explored at other times by using Heart of Shadow or Viper's Defense in Linnok Courtyard. Bring at least one hero, henchmen, or other player; without someone to target, your character will shadow step to a random location and many repeated attempts will likely be necessary. Move close to the portal to Shing Jea Monastery, and turn your character until a hero or henchman moves into a position leaving your character directly between that hero or henchman and the portal, or have another player move to that position. Using hero flags is another option. Target that character, hero, or henchman and use the one of the above skills to shadow step across the portal. If successful, your character will end up on the other side of the portal without zoning into Shing Jea Monastery, and after walking through the monastery grounds to the closed gate leading to Monastery Overlook, your character can walk into the overlook area as if the gate was not there.
- Shing Jea Arena: There is an arena that is commonly missed that can be accessed by talking to the Arena Guard in Shing Jea Monastery that accounts for .2% of the map.
- Zen Daijun (explorable): Two doors in the south east will be open which were closed during the mission.
- Kaineng Center: There are stairs down to the long pier along the western side of the city past the armor smiths.
- Vizunah Square: This is one of the only missions that does not offer a matching explorable area. You will need to scrape the mission while doing it. Also, try to gain access to the other starting point to scrape there too. Canthan-born characters can accompany foreign born characters in doing the quest Welcome to Cantha to access Vizunah Square (Foreign Quarter) and foreign characters can accompany Canthan-born characters in doing Mayhem in the Market to access Vizunah Square (Local Quarter). The best place to find a group doing Mayhem in the Market is The Marketplace. Note that after thoroughly scraping Xaquang Skyway and the Vizunah Square (Foreign Quarter) mission, access to the Vizunah Square (Local Quarter) will not add any percentage of the map to your title. Starting from the Foreign Quarter it is possible to run into the Local quarter starting area and get about .1%. Be sure to scrape the walls between the open areas.
- Dragon's Throat (mission): While nothing inside this mission is available, walking outside to the explorable area Shadow's Passage can reveal commonly missed parts of the map. Scrape well around the NE corner.
- Tahnnakai Temple (explorable): Has a large northern region open for exploration that is inaccessible during the mission. Make sure to take the ramps up to the areas above, past the merchant. Pay close attention to the SE corner. About 1.1% can be gained beyond what is usually gained through the mission.
- Arborstone (explorable): On the journey from Tanglewood Copse to Arborstone, there is an area down in the ravine that can only be explored from this direction via teleportation skills such as Necrotic Traversal. However, this area can be more easily explored (if not a farther way to go) by entering the area from the northern exit of Altrumm Ruins. This can also be done by players who don't own Prophecies but do have friends with Necrotic Traversal. They must kill the monsters on the rock, your friend must use Necrotic Traversal and take rebirth with him. Then you just have to sacrifice yourself death like using Spirit Light so your friend can resurrect you with Rebirth.
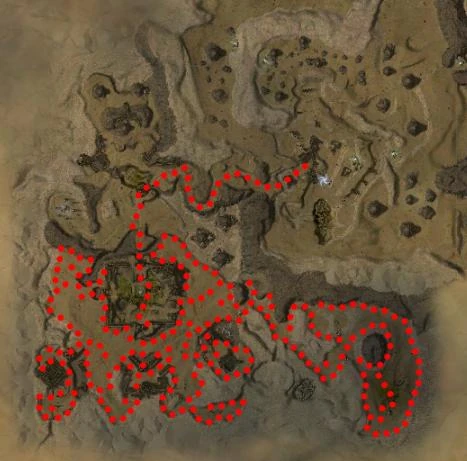
Map of the area explorable by going behind Eredon Terrace
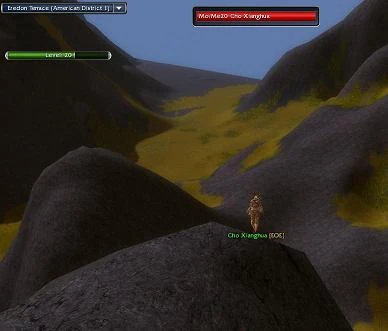

The view of the end of the world from the glitched area of Eredon Terrace

Standing on the end of the world from the glitched area of Eredon Terrace
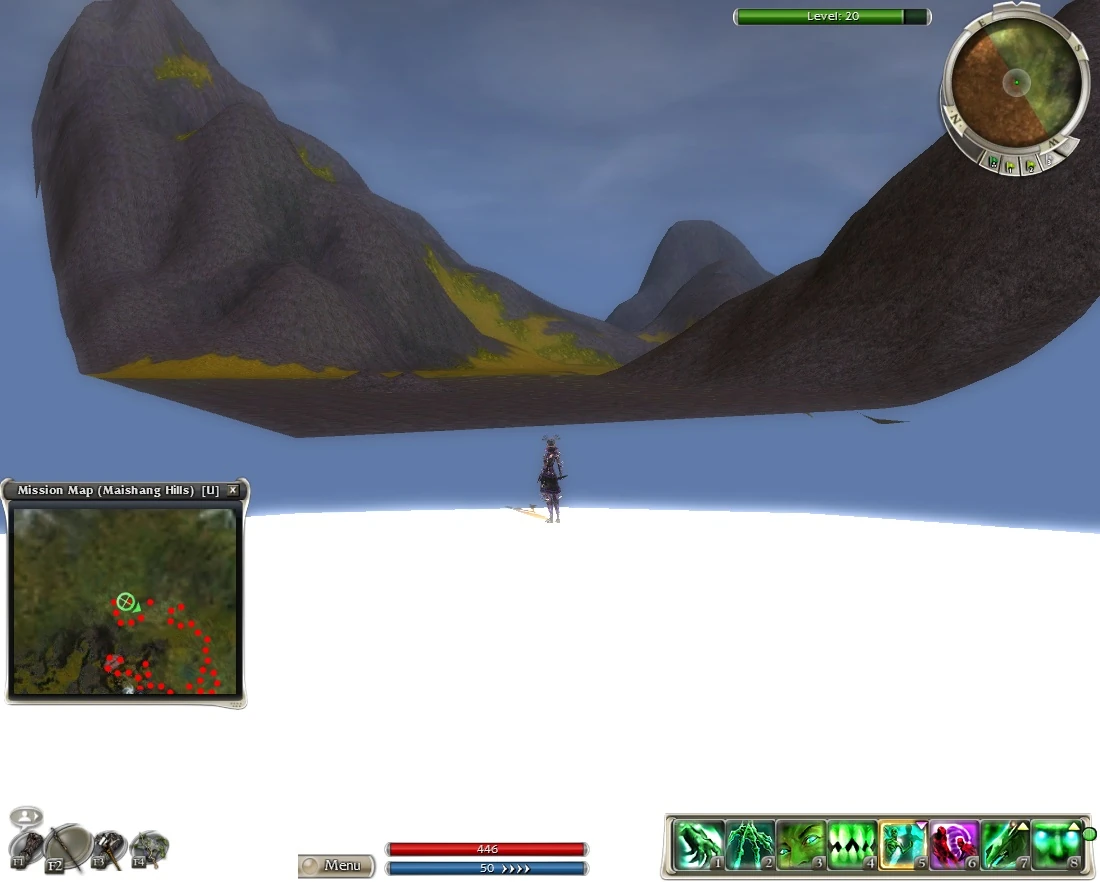
- Eredon Terrace: If you are part of the alliance that controls this town you can access a glitched area behind the exclusive area that allows you to enter the outskirts of the town. Although the area explored is permanently in fog on the map, it counts for about 0.5%. If you are not part of that alliance, the exclusive area can be accessed by using the tricks listed on the area boundary page to cross the portal from Maishang Hills without triggering the normal transition between zones.
- The Heart of Shadow or Viper's Defense trick is the simplest way, but getting very close to portal is important to do this successfully.
- Using the other tricks relies on getting the Luxon Merchant or Kurzick Merchant to cross the portal. There are a number of ways to do this.
- If you are opposed to the faction controlling the portal, you can opt to fight the Luxon or Kurzick NPCs there by talking to the priest and selecting the appropriate options. The merchant will almost certainly run through the portal, and you can shadow step to him using one of many shadow stepping skills. Beware when using Aura of Displacement, as it must be kept up to stay in the town. Death's Charge is a better choice. Alternatively, you can kill the merchant through the portal with ranged attacks and use the Necromancer skill Necrotic Traversal or Consume Corpse.
- If allied with the controlling faction, but not part of that alliance, bring Return, Recall, Shadow Meld, or Death's Retreat and lure the nearby wallows to the shrine to force the merchant to flee, and then shadow step to him.
- Fort Aspenwood: This competitive mission can provide about 0.6% by doing a cursory scrape to a person who has already mapped surrounding areas.
- Jade Quarry: It will yield about 0.5%. It is not necessary to get into this area at all, however.
- Note: People generally frown upon explorers in Competitive Missions.
- Unwaking Waters (explorable): There is a small cul-de-sac just north of the exit on the Kurzick side. Don't miss it. Scrape the northern wall of this area carefully, especially near the saltspray dragon boss. You can also use a skill like Necrotic Traversal to explore the southernmost loop and uncover the island. Don't let looks fool you--gates in this extra area are just for show. You can walk right through them.
- Raisu Palace (explorable) has a large area to the north which can only be reached after the mission, leaving from Imperial Sanctum (location).
- Don't forget to scrape the edges when banished during the Imperial Sanctum mission. You can kill the spirits there, or bring some defensive and healing skills, and scrape carefully. A cloud to the north-east is cleared by scraping an area to the north-west, so again, scrape carefully. Shiro never banishes a human player if he's the only human in the party so doing the mission solo or with henchmen won't work. The easiest way to get banished is to enter the mission with a friend and ask him to take off any health decreasing runes and items, since Shiro tends to banish the player with the lowest health within his aggro range. Note that, although there are several portals visible at a distance from the center battle area, Shiro will always banish players to the same portal, towards the north-west. The other portals can't be reached.
- All of the Challenge Missions except Dragon's Throat allow you to explore small amounts of the map inaccessible by the surrounding zones.
- For players who do not wish to enter the Competitive Missions, it is possible to reach 100% of Cantha without entering either provided you scrape the outposts on both sides very carefully and take advantage of the glitches and necrotic traversal tricks listed above - but be prepared for increased difficulty in achieving the title, as every little bit really counts.
Elona
- If your character is foreign-born, do not skip the cutscene in the travel quest (Sunspears in Kryta or Sunspears in Cantha) as it uncovers a small area on the Island of Shehkah that is not otherwise accessible to you.
- Island of Shehkah: Initial Tutorial Area.
- This tip will only work for new Nightfall characters starting out. You cannot return to this area after leaving it.
- When first starting in this area, Kormir will offer you the choice of a tutorial. If you accept the tutorial, you will be led across the bridge to the village. If you choose to skip the tutorial, you will be taken through the swamp to the village. Either way you choose, you will gain .5% exploration.
- If you choose to accept the tutorial, you can then explore the entire swamp area, in addition to proceeding to the village across the bridge. This will net you an additional .2% exploration for a total of .7% after leaving the tutorial.
- The extra .2% isn’t required at all to achieve Grand Master Cartographer.
- The Sunspear Arena, which is accessible only to characters who are level 10 and under (its outpost can be explored by anyone, however), is easily missed. It can be accessed by talking to the Arena Guard near the Consulate portal in Kamadan, in the north-east corner.
- Chahbek Village:
- Take a teleport skill, such as Necrotic Traversal. At the beginning of the mission, kill the first guard on the boat and teleport to him. This will uncover a piece less than 0.1%.
- Kodlonu Hamlet:
- Go down to the docks on the north side of the town and out on to the boat. This will uncover the island in the bay for an extra 0.1%.
- Marga Coast:
- An area that is not normally accessible can be accessed by flagging a hero or henchmen past the portal to Sunspear Sanctuary from Marga Coast. Once they are across the portal and off to the side where the terrain blocks the line of sight to them, a skill such as Ebon Escape, Death's Retreat, Return, and Shadow Meld can be used to shadow step to the ally's location. An end of the world is present on the other side, but far enough back to allow about 0.1% to be explored. A video of this can be seen here.
- Pogahn Passage (mission):
- There is a seemingly closed door to the west of the Escape Point . You can run straight to the door after starting the mission and walk through it to explore more of Gandara's southwest area. The correct door has 2 Kournan Guards behind it.
- After an NPC says "So I took a risk.", you can choose to skip the cinematic. If you do so, it will uncover a small invisible section of the map.
- Wehhan Terraces:
- Go into Bahdok Caverns and scrape the north wall near the entrance to the zone(once you load into the caverns head back in the direction of the entrance).
- During the Dzagonur Bastion mission, you can run through the closed door where the portal to Resplendent Makuun is, and explore a small portion worth less than 0.1%. Assigning a Disciple of Secrets to each gate will give you enough time to run there with the entire party and explore this glitch.
- While most Challenge missions in Nightfall do not count towards the title, Remains of Sahlahja does, contributing up to 1.9%.
- In the outpost Chantry of Secrets there is an area to the west that is only accessible by talking to the guard standing next to the gate after defeating the end boss Abaddon; this area counts for around 0.1% of the title.
Specific Tips and Strategies
These are specific tips and strategies for mapping mission or explorable areas.
Tyria
- Flame Temple Corridor and Dragon's Gullet: Using the shadow stepping trick documented in the area boundary article on the portal between these two zones, it is possible to explore them without mobs. Cartographers would have to deal with only the mobs found along the initial trip to the portal in Flame Temple Corridor.
- North Kryta Province: Having The Ascalon Settlement quest active will allow you to pick up the "Ascalon Heroes" as added henchmen, allowing you to explore the area with ease. (Note that the heroes will leave you if you leave North Kryta Province.)
- Nebo Terrace and Cursed Lands: Using the shadow stepping trick documented in the area boundary article on the portal between these two zones, it is possible to explore them without mobs. Cartographers would have to deal with only the mobs found along the initial trip to the portal from either direction. Approaching from Nebo Terrace would be the shorter way.
- Kessex Peak: It is easier to explore this area if someone in your party has The Villainy of Galrath quest active, there will be fewer members of the Cult of Verata to fight.
- The Wilds: North-east (where the bonus takes place by the lake) and north-west are spots missed by many players.
- Divinity Coast (mission): Exploring the coastline north of the village of Loamhurst can be difficult, as the Eye of Janthir can trigger the end of the mission if it hovers above the shrine that is located in the center of the village. For this reason, try to avoid having all your party members approach the shrine while mapping the coastline. Exploring the coastline at the end as well as scraping the northern and western areas of the swamp and the northern wall of the Mantle's keep can yield at least 0.1% of the map. Sneaking all the way around the shrine at the end is not necessary; you only need to pass it to the east, as all of the coastline to the west can be unlocked by careful wall-crawling along the path to the south. Another strategy to use is right before the end of the mission, go back to the swampy area where there are multiple gates. Have one person move the eye behind one of the wooden gates. This will trap the eye so that it will not follow you as you explore the mission's end.
- Spearhead Peak: Using the shadow stepping trick documented in the area boundary article on the portal between [Tasca's Demise]] and The Granite Citadel allows Spearhead Peak to be explored without mobs.
- Iron Mines of Moladune (mission): Join a party whose primary interest is completing the bonus for the mission; depending on the route taken by the party you should be able to map most of the path along the eastern side of the mission area. However, your armor must be infused.
- Ring of Fire (mission): The western side of the island can be difficult to map with a full party of henchmen, and since most people who attempt the mission or bonus by going through the front gate, the best strategy for mapping this area is to join a skill-capping party as some of the bosses spawn on that side of the island.
- Abaddon's Mouth (mission): The best way to map this area is to join a bonus and/or skill-capping group as either activity will allow you to map most of the area in the mission.
Cantha
- Nahpui Quarter (mission): Do not kill the four Celestials, instead pull the Star Tengu away from each Celestial creature and deal with them instead. This strategy will make mapping the area easier as you do not have to deal with any of the celestial spawns that appear after killing each Celestial.
- Wajjun Bazaar: While having the Seek out Brother Tosai quest active, the Am Fah will not attack you. (See quest for exceptions).
- Boreas Seabed (explorable): Most of this region can be easily mapped by doing the first part of Boreas Seabed mission – after defeating the three teams, simply head out the gate, go north and start scraping the edges/walls, working your way clock-wise around the region. You will not encounter the usual mobs that frequent the area.
- Gyala Hatchery (mission): If you slip around the turtles and the first ambush doesn't spawn, you're able to explore most of the map without encountering any enemies. However, killing any Kurzick mobs will spawn additional mobs which can be difficult to defeat without Siege Turtle support.
- The Eternal Grove (mission): Leave some of the rangers following the second center turtle alive and go explore.
Elona
- Consulate Docks: During the mission, when exiting the ship, turn right and scrape the end of the dock. This has been known to expose up to 0.3%
- Gandara, the Moon Fortress: Virtually the entirety of Gandara can be explored during the Pogahn Passage mission without having to fight any enemies. This is easily accomplished while still wearing the Kournan Guardsman disguise as long as you do not advance to the point in the mission where your characters rescue Kormir and Shahai the Cunning.


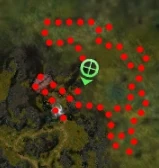
Easy exploration without much trouble
- Garden of Seborhin: During the Tihark Orchard mission when the skree attack, the Vabbi Guards blocking the stairs near Zilo the Drunkard will move aside to fight. You will then be able to travel up the stairs and explore the entire Garden of Seborhin zone without encountering any monsters. Alternatively during said mission you can use assassin skills Recall, Return, Shadow Meld, Death's Retreat or Ebon Escape on the guards at the very beginning of the mission to get around them. It is also possible to walk through the wall on the left of the guards at the beginning to get out.
- The Sulfurous Wastes: During the Gate of Desolation (mission), the western areas of the zone are clear of foes, making them easy to explore. There is also an area in the NW of the map accessible only by collapsing a non-targetable column using Junundu Smash.
- Dynastic Tombs: During the Remains of Sahlahja Challenge Mission, be sure to explore all the zones, which is hard considering you have to open them all and avoid the Maddened Spirits at the same time. Beware that this challenge mission is almost a different game by itself; you may find it quite frustrating if your only purpose is to get the Grand Master title.
- Consider only mapping one zone at a time. While it may seem tedious to restart the mission over and over, this is actually a very efficient strategy, as you won't be wasting time trying to gain enough points to open all the doors in one go.
- Use Junundu Tunnel as often as possible, and bring skills which increase your speed for mapping rocky terrain by foot; this will help compensate for the delay caused when your Junundu swallows you/spits you out.
- If running on rocky terrain, it may be a good idea to take the skill "Can't Touch This!" in addition to your speed increase skills, because the Maddened Spirits won't be able to attack you for a certain time and a short encounter with them won't end in a sudden death.
- If you really hate mapping the Dynastic Tombs, note that it's possible to reach 100% without mapping the entire area: this editor was able to achieve the title with two full zones unexplored.
- Not all areas are mappable; unlike Tyria or Cantha, you won't have to reach the end of the game to get that title, making it much easier to get this title than both others.
Missions vs Explorable Areas
- Blacktide Den (mission) vs Lahtenda Bog There are fewer foes to kill if you explore during the mission rather than the explorable area.
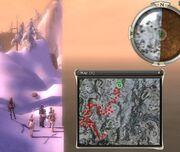
- Jokanur Diggings (mission) vs Fahranur, The First City Although only a portion of the Fahranur map is available during this mission, there are fewer foes to kill in that area. You may want to consider exploring the mission area and finishing off the exploration by leaving from the Blacktide Den (location) to finish off your exploration. The below picture shows the explorable area available during the mission.

External links
- Cartography video guide- http://www.youtube.com/watch?v=Uxjee24qZ_E